This sample file is an Adobe Stock asset you can use to practice what you learn in this tutorial. If you want to use the sample file beyond this tutorial, you can purchase a license on Adobe Stock. Check out the ReadMe file in the folder for the terms that apply to your use of this sample file. Show
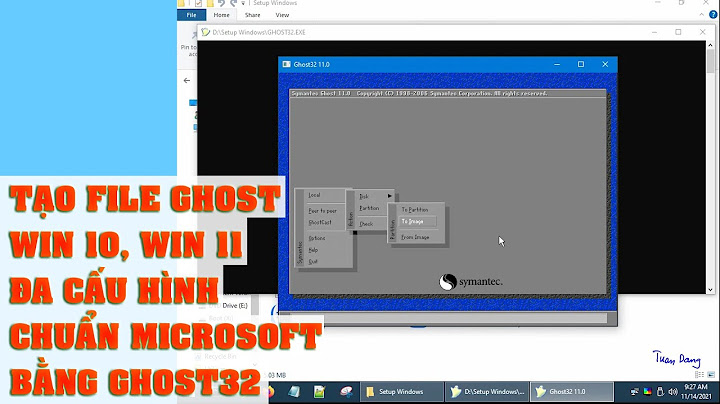
What you learned: How to change page sizes in a documentWhen you create a new document, you specify what page size to use. But sometimes you might need to change the page size after you start work on a file. Phần mềm adobe indesign là một phần mềm chuyên dụng nhất sử dụng cho thiết kế dàn trang catalog, sách, báo….. Một công việc muôn thửa của làm sách báo là đánh số trang tự động, đây là việc tuy không khó nhưng rất nhiều bạn còn loay hoay chưa biết làm thế nào. Vì vậy, trong bài viết này, tuyettac.org xin giới thiệu đến các bạn cách đánh số trang tự động trong indesign cs6 Đầu tiên các bạn cần tạo một file làm việc mới với khổ giấy A4 như hình bên dưới  Tiếp theo, chúng ta sẽ làm việc với master A ( cái này là mặc định khi tạo file sẽ có). Các bạn kích chuột trái 2 lần vào hình icon page bên cánh A-Master để nó hiện ra khung bên dưới là khung preview cho toàn bộ file của các bạn Trên 2 trang này, chúng ta tạo header, footer cho cả 2 trang thì sau này khi chúng ta thêm trang mới trang đó sẽ tự động có footer và header Đối với cách đánh số trang tự động, đầu tiên các bạn sử dụng công cụ viết chữ trong indesign tạo ra 1 khung tại vị trí muốn đặt số trang như hình bên dưới( chú ý không được viết chữ gì vào) Tiếp theo, vào type →Insert specical characher → markets → Curent page number để hệ thống nhận định đây là vị trí đánh số trang Sau khi kích vào Curent page number , vị trí chúng ta tạo khung khi nãy sẽ tự động hiện ra chứ A như bên dưới Nếu bạn chỉ là với 1 trang như hình trên thì hệ thống sẽ mặc định là trang có vị trí số chẵn sẽ được đánh trang còn số lẻ thì không, vì vậy các bạn cần làm footer, header, đánh số trang với cả 2 trang như hình bên dưới Sau đó các bạn chỉ cần tạo trang mới, indesign sẽ tự đánh số cho bạn( trước đó bạn phải thoát khỏi chế độ cài đặt marter bằng cách kích chuột trái 2 lần vào trang số 1 trong khung page) Vậy là các bạn đã có thể đánh số trang tự động bằng những bước đơn giản như trên. Một vấn đề nữa xảy ra là các bạn muốn đánh số trang bắt đầu từ trang số 3 chẳng hạn thì làm như thế nào ???? Về việc này đầu tiên các bạn cần tạo 1 master khác chứa 2 trang đầu bằng cách kích chuột trái vào chữ master A chọn Apply master pages như bên dưới Các bạn chon master none, số trang từ 1-2 như hình bên dưới Vậy là chúng ta đã có 2 master none và A, với none – master chưa có footer, header, còn A-master đã có hết, giờ chúng ta sẽ đanh số trang từ trang số 3 bằng cách kích chuột phải vào trang số 3 chọn numbering & section options như hình dưới Các bạn đặt thông số như bên dưới
Vậy là chúng ta đã hoàn thành việc đánh số trang bắt đầu từ trang số 3, với 2 trang đầu bạn có thể làm bìa báo Sau bài viết này các bạn đã biết cách đánh số trang tự động đơn giản trong indesign cs6 và cách làm việc cơ bản với master An object that spans multiple pages stays with the page on which the object’s bounding box covers the most area. Go to Windows \> Pages to access the Pages panel. Start a document with a two-page spreadInstead of beginning the document with a single page, you can begin your document with a two-page spread. Create a new document
Update an existing document
Create a multiple-page spreadMost documents use two-page spreads exclusively. When you add or remove pages before a spread, the pages shuffle by default. Within a spread
With any page
You can include up to ten pages in a spread. When you have reached the limit, the black vertical bar will not appear. Redistribute spreads or pagesYou can redistribute a spread’s pages to match the Facing Pages setting in the Document Setup. Spreads
Pages
Move pagesYou can move pages with a document and also between two different documents. When you move pages between two documents, if both contain styles, layers, or parents with the same name, the destination document settings are applied to the moved pages. Within a document
Between two documents
If you copy a page from a document that has a different size than the document you're copying to, the page and page item positions may not match exactly. However, you can . Duplicate a page or spreadYou can duplicate a page just after the selected page or at the end of the document. You can also split a page from a spread or delete pages and spreads.
Hide spreadYou can hide selected spreads to exclude them from export options and presentation mode.
To revert this change, select the spread > Pages panel menu icon > select Show Spread. Split a page from the spread
Rotate the spread viewYou can rotate the spread view when you work on rotated calendars and tables. Rotation of the spread view does not affect printing or output. |